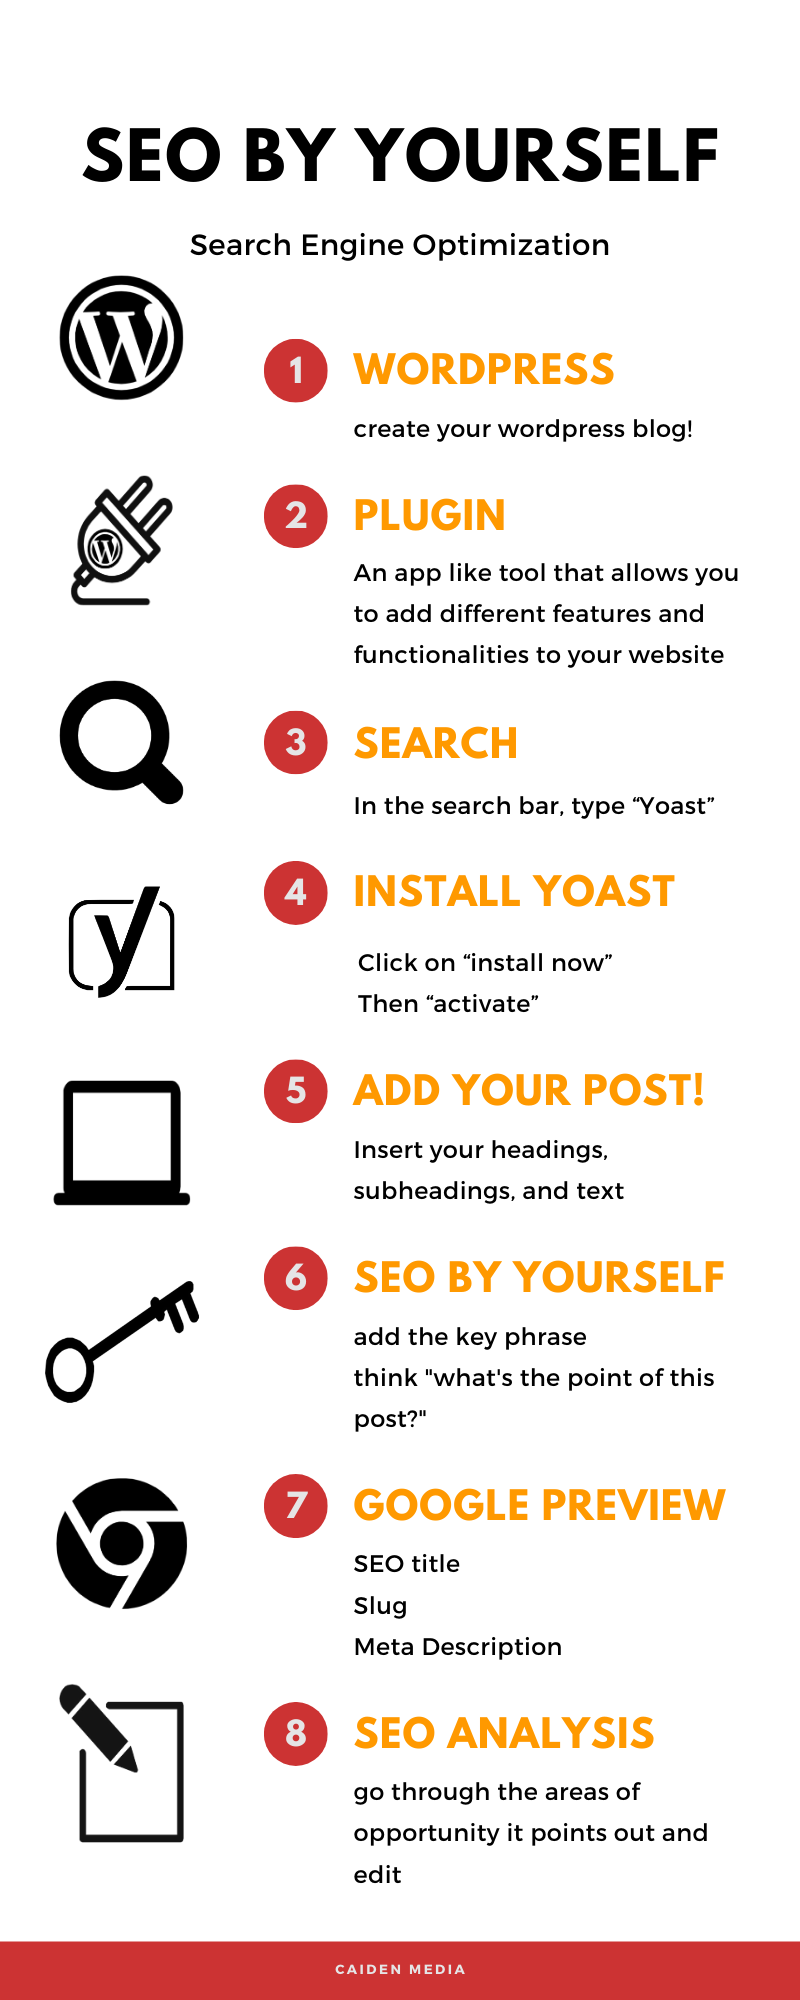
Yoast is a great plugin tool that allows you to do SEO by yourself on WordPress. SEO is Search Engine Optimization. It’s an organic strategy to gain your target audience’s attention to your website.
Here are 8 steps to using SEO by yourself!
Step 1 – WordPress
- Yoast is a WordPress plugin
- In order to use this plugin, your website should be created through WordPress
Step 2 – Plugin
- On the left column on WordPress, click on “plugin”
- Then click on “add new”
Step 3 – Search
- In the search bar, type “Yoast”
- It will be the first result on the left
Step 4 – Install Yoast
- Click on “install now”
- Then “activate”
- After the plugin is activated, it will show on the bottom left column
Step 5 – Add Your Post!
- Now that you downloaded Yoast, you can put it to use!
- Create your post
- Insert your headings, subheadings, and text
Step 6 – SEO by Myself
- Now that you added your post, it’s time to optimize it and make it noticeable!
- Scroll down the same page you added your post and add the key phrase
- Think “what’s the point of this post?” “Who am I attracting?”
Step 7 – Google Preview
SEO title
- Have your key phrase in your SEO title so it can be easily identified by your audience
- It’s the first thing people will see while browsing the internet, before going to your website
Slug
- The slug is a part of your URL of the page containing your post
- Ex. www.myblog.com/this-is-a-slug
Meta description
- The blurb people will read under your SEO title
- It’s a snippet of the content they’re about to read or browse
Step 8 – SEO Analysis
- What makes this plugin so great is its ability to identify your areas of opportunities to make your post more optimized
- Go through those points thoroughly, and make your improvements
Now that you completed the SEO steps, your post is ready to be published!


