Are you creating a blog post? Here is an easy step-by-step guide on how to create a blog post on a WordPress website.
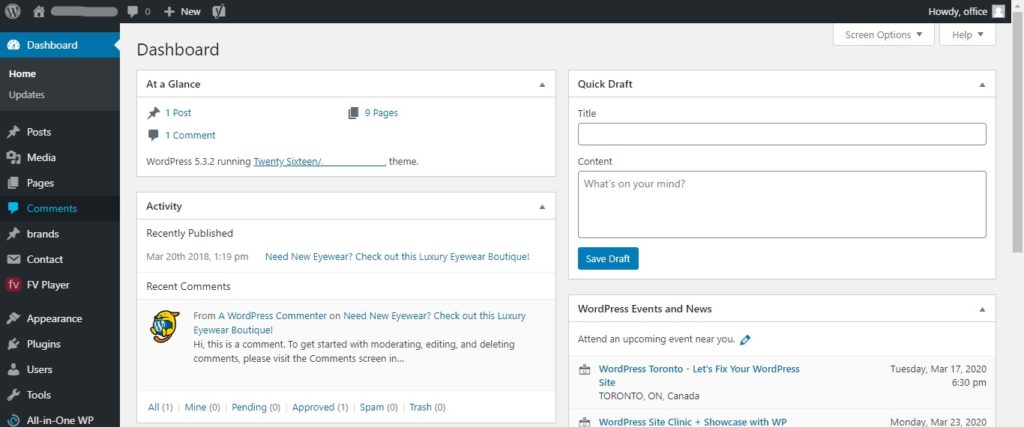
Step 1: Access your WordPress website. Once you have accessed the WordPress website you will have a screen that looks like the image below.
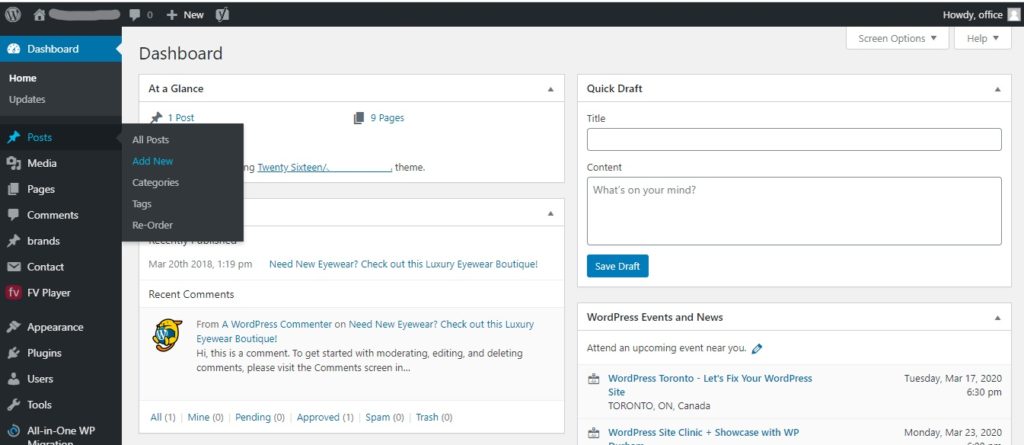
Step 2: Now hover over “Posts” until a menu pops up, from there select “Add New”.
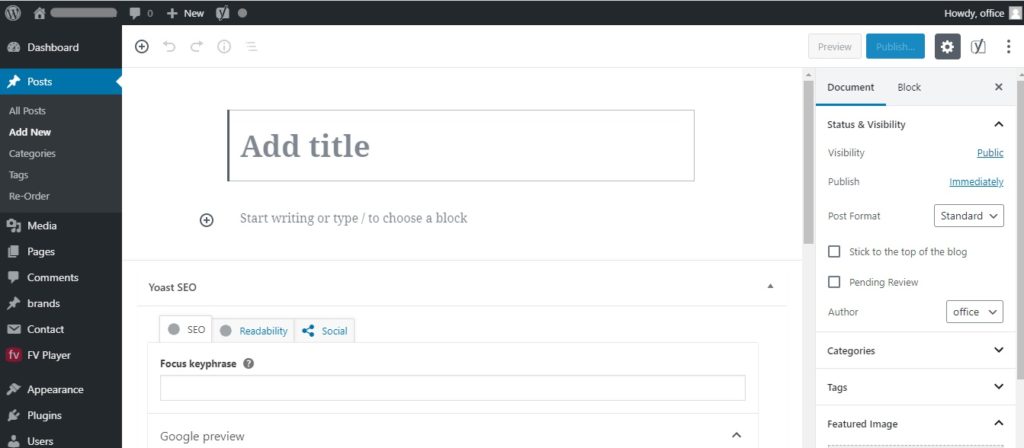
Step 3: Once you have selected “Add New”, your screen will look like the image below. Now you can start to add your content. Add title and the written content of your blog post.
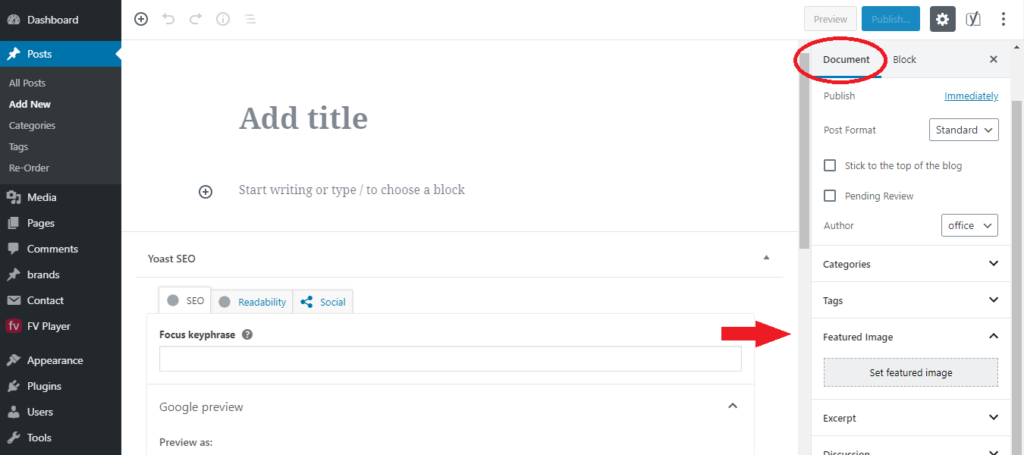
Step 4: Once you have added the title, written content and edited everything how you want, you can add a featured image. A featured image is the image that will appear as the thumbnail of the blog post.
On the right side of your screen, under “Document” select the tab called “Featured Image” then click “Set featured image”. Here you can upload any image you like.
Step 5: Now that you have added the title, written content, featured image and edited everything to your satisfaction, you can select “Preview” or “Publish” found on the top right corner of the screen.
Select “Preview” to see how the blog post will look once published.
Select “Publish” to publish your blog post on to your website.

Once you are happy with the look of your blog post click publish. Now you have created a blog post on a WordPress website using 5 easy steps!




This Post Has One Comment
Like!! I blog quite often and I genuinely thank you for your information. The article has truly peaked my interest.
Comments are closed.